In this article, we will learn how to use the Check for Issues feature in Excel.
Excel has long been a go-to tool for organizing, analyzing, and manipulating data. However, as spreadsheets grow in complexity and size, the potential for errors and inconsistencies also increases.
To help users tackle these challenges, Microsoft Excel offers a powerful built-in feature called “Check for Issues.” This feature equips users with a range of tools and functionalities to identify and resolve common issues within their spreadsheets, ensuring data accuracy and integrity.
Download Practice Workbook
Download this practice workbook for practice while you are reading this article.
What Is the “Check for Issues” Feature in Excel?
The “Check for Issues” feature in Excel is a built-in functionality that helps users identify and resolve common issues or errors in their spreadsheets.
It provides various tools and options to check for errors, inconsistencies, and data problems, allowing users to ensure the accuracy and integrity of their data.
The feature includes functionalities such as error checking, formula auditing, data inconsistency checks, and more.
By utilizing the “Check for Issues” feature, users can effectively troubleshoot and resolve issues within their Excel spreadsheets.
How to Use the Check for Issues Feature in Excel
In this section, we’ll learn how to use the Check for Issues feature in Excel. Let’s follow the instructions below to learn!
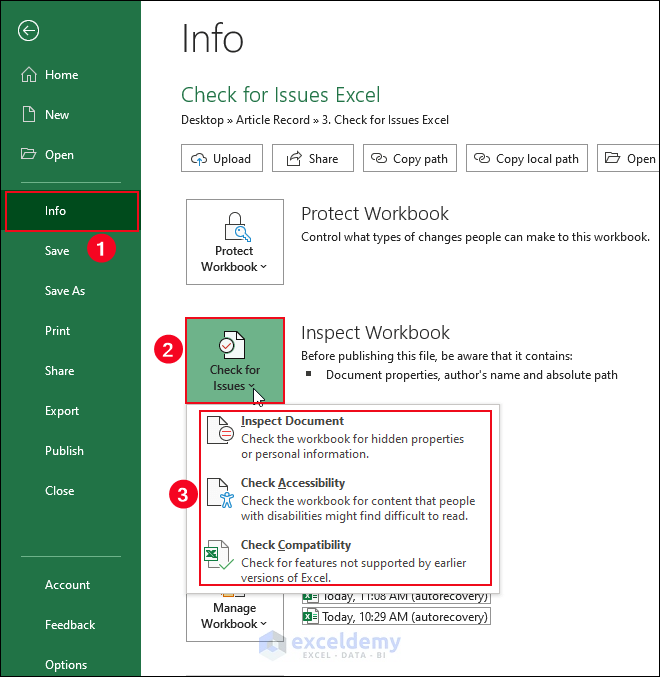
- Go to the File tab >> Select Info option >> Cheese the Check for Issues feature.

Hence, perform the following features.
1. Inspect Document
Before sharing the workbook with others, it is important to check for any concealed information, for instance, custom XML data, personal details, or other embedded or hidden content.
This hidden content could potentially expose sensitive information about your organization or the workbook itself, which may not be intended for public sharing.
It is advisable to remove this hidden information to ensure privacy and confidentiality when distributing the workbook to others.
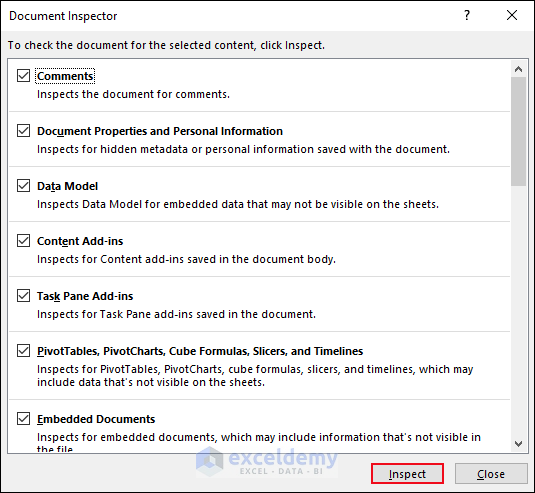
- Now choose the Inspect Document option >> a Microsoft Excel warning dialog box pops up >> Press Yes.

- As a result, the Document Inspector dialog box will appear >> Check all the features >> Select Inspect.
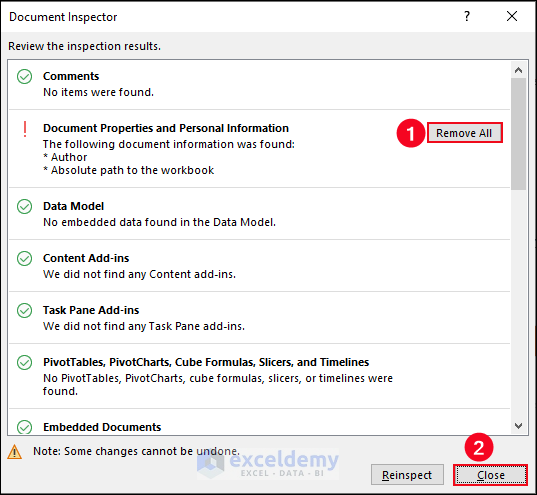
- After that, select the Remove All option >> Click on Close.
- The workbook’s hidden data is deleted and no other person can access it.
2. Check Accessibility
After that, select the Check Accessibility option from the Check for Issues drop-down list.
Excel automatically navigates to the sheet containing the problematic object and highlights it, allowing you to conveniently make any necessary modifications.

3. Check Compatibility
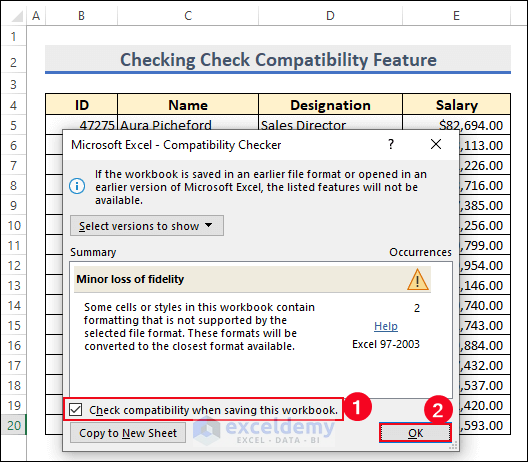
While sharing your workbook with individuals who have an older version of Excel, it is advisable to run the Compatibility Checker. This tool helps identify any data or features that may not be compatible or accessible to those users.
- Now, select the Check Compatibility option from the Check for Issues drop-down list.
- As a result, the Microsoft Excel – Compatibility Checker dialog box pops up >> Check the Check compatibility when saving this workbook option >> Hit OK.
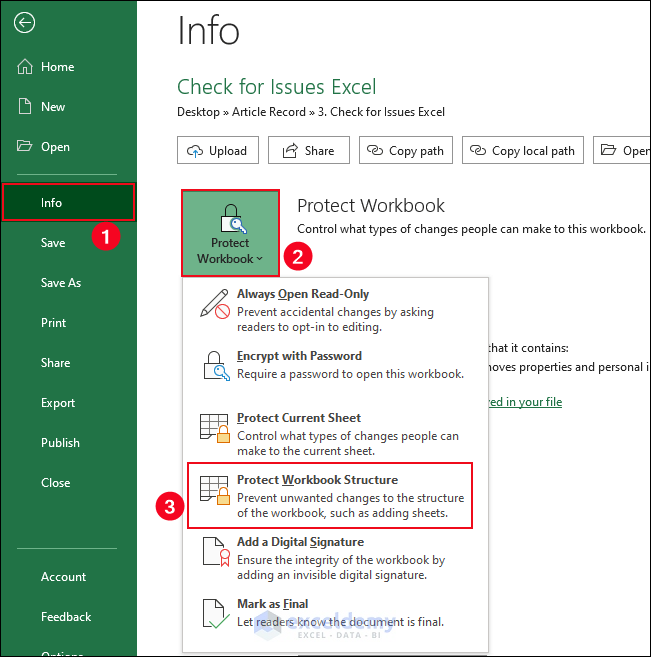
How to Protect Workbook in Excel
In this portion, we’ll learn how to protect an Excel workbook.
- Select the File tab >> Select Info option >> Cheese the Check for Issues feature.
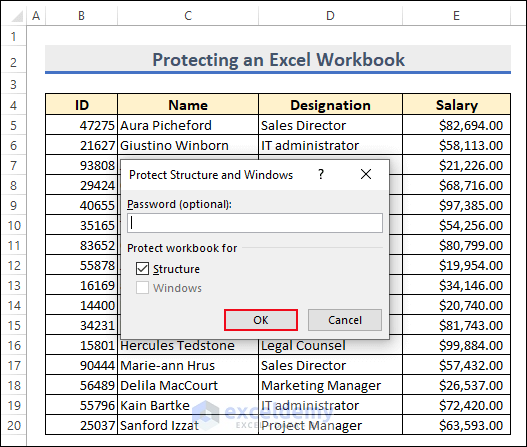
- Inserting a password is optional to protect the Excel worksheet >> Press OK.
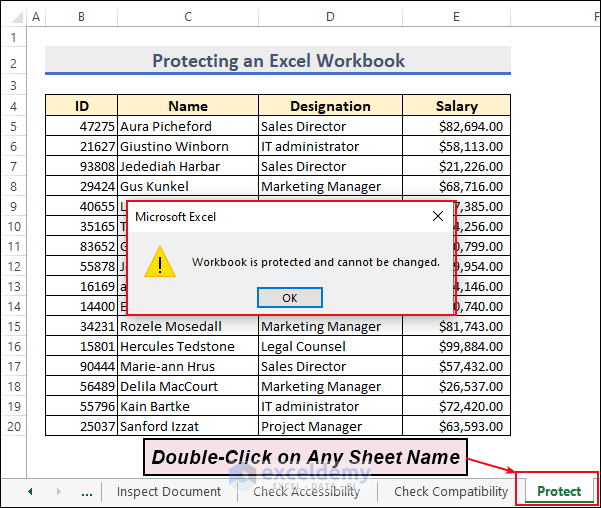
- Hence, you will be able to protect the Excel workbook. To check it, press double-click on any sheet name.
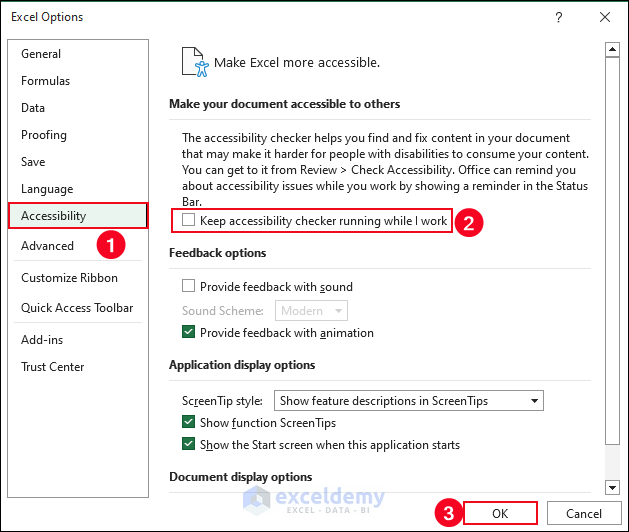
How to Turn Off Accessibility Investigate in Excel
You will easily turn off the Accessibility Investigate in Excel. Let’s follow the instructions below to learn!
- Press Alt + F + T one after one. Hence, the Excel Options dialog box will appear.
- Select the Accessibility option >> uncheck the Keep accessibility checker running while I work option >> OK.
Things to Remember
- Ensure that the error-checking options are enabled in Excel’s settings to utilize the “Check for Issues” feature effectively.
- Customize the error-checking options to suit your specific needs and preferences.
- Enable or disable specific checks based on your requirements.
Frequently Asked Questions
1. How often should I use the “Check for Issues” feature in Excel?
Answer: It is recommended to use the “Check for Issues” feature regularly while working on your Excel spreadsheet, especially when dealing with complex formulas, large datasets, or collaborative projects. By performing periodic checks, you can catch and address issues early on, ensuring the accuracy and integrity of your data and calculations.
2. How do I fix errors in Excel formulas?
Answer: To fix errors in Excel formulas, follow these steps:
- Identify the cell or cells that contain the error. Excel usually highlights the cells with an error indicator.
- Review the formula in the cell to identify the mistake. Common errors include misspelled function names, incorrect cell references, or missing parentheses.
- Correct the error in the formula by editing the cell. You can click directly in the formula bar to make changes.
- Press Enter to apply the corrected formula.
- Verify that the error is resolved and that the formula produces the desired result.
3. Can I customize the checks performed by the “Check for Issues” feature in Excel?
Answer: Yes, you can customize the checks performed by the “Check for Issues” feature in Excel. By accessing the “Formulas” section in the Excel Options dialog box, you can enable or disable specific checks based on your preferences and needs. This allows you to tailor the error-checking functionality to suit your specific requirements.
Conclusion
The “Check for Issues” feature in Excel empowers users to maintain accurate and error-free spreadsheets. By leveraging its error checking, formula auditing, and data inconsistency detection tools, users can identify and resolve issues that may compromise the integrity of their data.
Regularly utilizing this feature helps ensure the reliability of calculations, improves data quality, and boosts overall productivity. Embrace the power of Excel’s “Check for Issues” feature, and unlock the full potential of your data-driven endeavors.

