This blog post will walk you through the process of swapping individual cells, rows, or columns, highlight its importance in data management, and offer helpful advice for carrying out swaps effectively. The ability to swap cells in Excel is a useful feature that enables users to effectively reorganize data, fix mistakes, and control data within a worksheet.
We will use Excel basic features as well as an advanced VBA code to dynamically swap cells in Excel.
Download Practice Workbook
You can download the practice workbook from the following download button.
How to Swap Cells in Excel Without Replacing
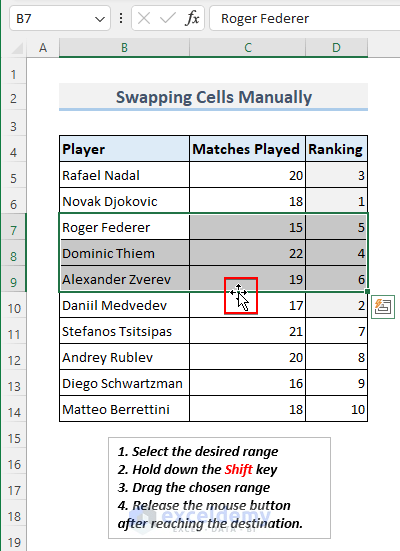
1. Using the Keyboard Shortcut to Swap Cells in Excel
- Choose the desired range >> Hold down the Shift key >> Drag the chosen range to the right or left, up or bottom >> Watch for the appearance of this icon‘工’>> Release the mouse button after that. You’ll observe that the cells are switched out right away.
- In the following image, you can see the results of swapping three rows with a single row.

- You can swap rows or columns manually, like in the process in the following video.
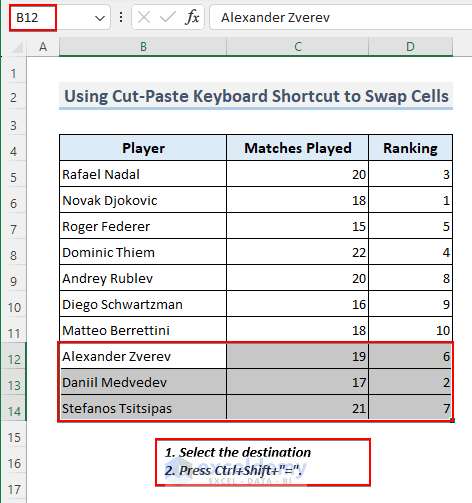
2. Using Cut-Paste Keyboard Shortcut to Swap Non Adjacent Cells
- Press Ctrl + X after selecting the desired rows, columns, or cells to be swapped.

- Choose a cell after that where you want to insert the cut cells. The Cut cells in the desired row will appear when you press Ctrl + Shift + =.
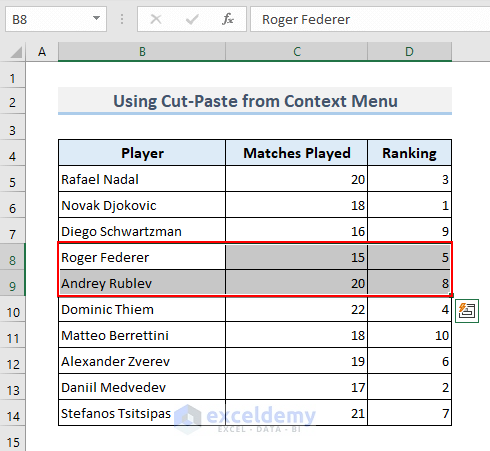
3. Using Cut-Paste from Context Menu to Swap Without Replacing
- Right-click the mouse on the range of selected cells >> choose Cut.
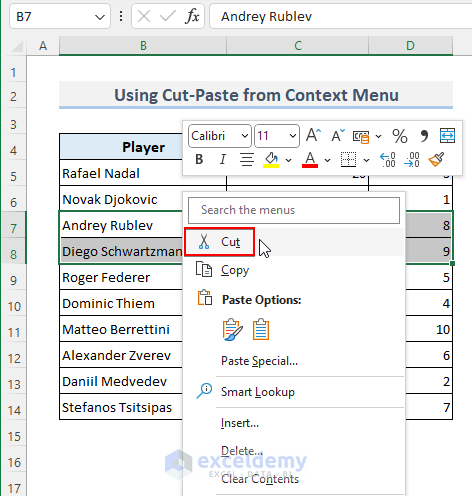
- Insert Cut Cells by choosing the command with a right-click on the mouse. The Cut cells above the chosen row will then appear.
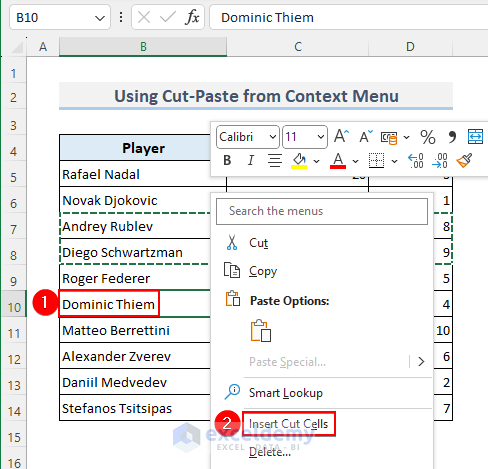
- Here the cut cells will be placed above the selected cell B10 after clicking on the Insert Cut Cells.
How to Use VBA to Swap Cells in Excel Both Along Rows and Columns
- First, select Visual Basic from the Developer Tab. The VBA editor will then show up. Alt + F11 can also be used to open it or click here about launching the VBA window.
- To open a VBA module, choose Insert >> Module. A VBA module will be opened by this command.

- Copy and paste the following VBA code into your module.
- Now Save and Close Microsoft Visual Basic for Applications.
Sub SwapCells()
Dim mn_rng As Range
Dim mn_tempRng As Variant
Dim mn_count As Long
Dim mn_rows, mn_columns As Long
Dim mn_s1, mn_s2 As Integer
Set mn_rng = Selection
mn_count = mn_rng.Areas.Count
If mn_count < 2 Then
    MsgBox "Please select not more than two ranges."
    Exit Sub
End If
mn_rows = mn_rng.Areas(1).Rows.Count
mn_columns = mn_rng.Areas(1).Columns.Count
For mn_s1 = 2 To mn_count
    If mn_rng.Areas(mn_s1).Rows.Count <> mn_rows Or _
        mn_rng.Areas(mn_s1).Columns.Count <> mn_columns Then
        MsgBox "Columns or Row number mismatch."
        Exit Sub
    End If
Next mn_s1
For mn_s2 = 1 To mn_count - 1
    For mn_s1 = 1 + mn_s2 To mn_count
        If Not Intersect(mn_rng.Areas(mn_s1), mn_rng.Areas(mn_s2)) Is Nothing Then
            MsgBox "Make sure selected ranges don't overlap."
        End If
    Next mn_s1
Next mn_s2
mn_tempRng = mn_rng.Areas(mn_count).Cells.Formula
For mn_s1 = mn_count To 2 Step -1
mn_rng.Areas(mn_s1).Cells.Formula = mn_rng.Areas(mn_s1 - 1).Cells.Formula
Next mn_s1
mn_rng.Areas(1).Cells.Formula = mn_tempRng
End Sub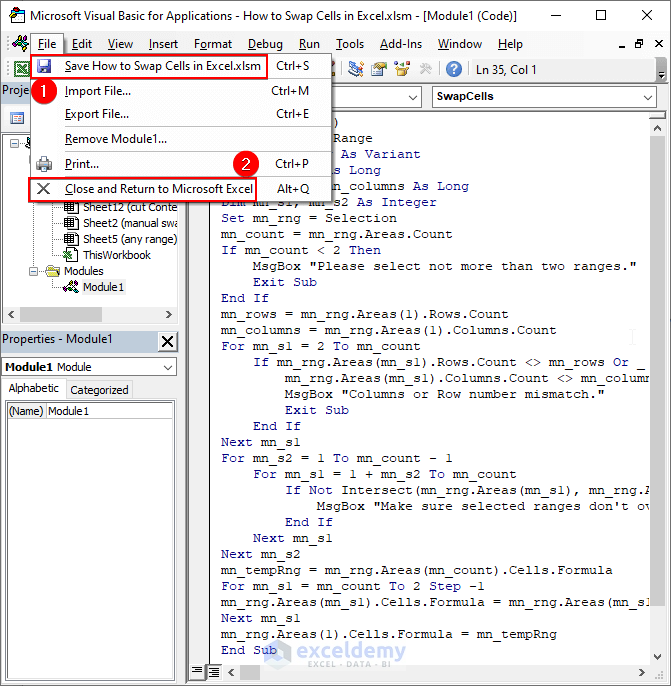
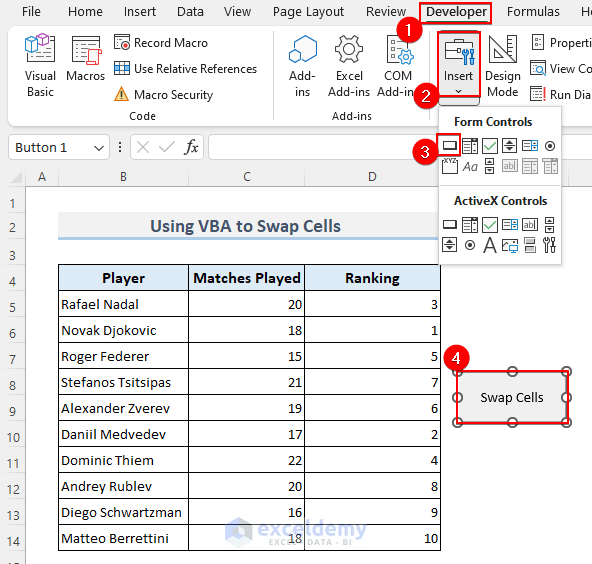
- Now go to Developer >> Insert >> Button(Form Control)>> draw the button>> write Swap Cells into the button.
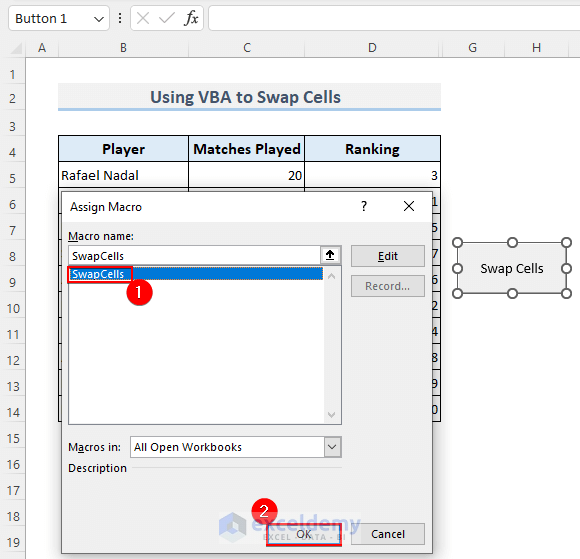
- Right-click the mouse on the Button for Swap Cells >> select Assign Macro.
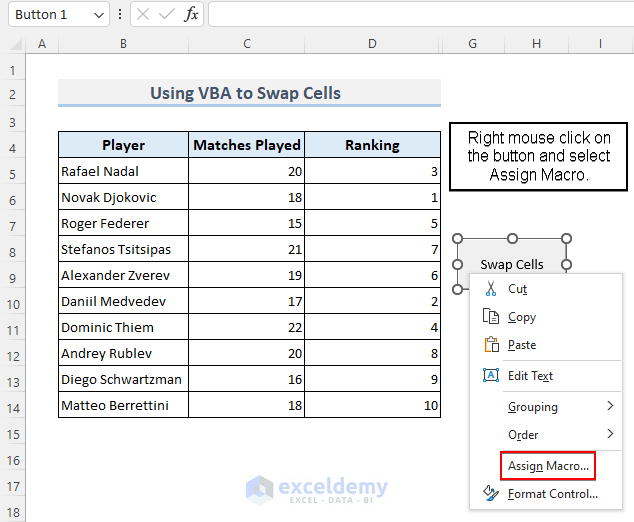
- The Assign Macro window will appear in Excel. Select the VBA code >> click OK.
- Finally, without hassle, you can swap cells that may be rows, columns, or any range with the VBA code. Our following Video has demonstrated that carefully.
Things to Remember
Data Integrity: To maintain data integrity, always double-check cell references and make sure the proper cells are included in the swap operation.
Formulas and Dependencies: To avoid calculation errors and data discrepancies, be mindful of any formulas or data dependencies associated with the cells you intend to swap.
Undo: Use the Undo function (Ctrl+Z) to quickly undo any unintended swaps and return the cells to their original configuration.
Frequently Asked Questions (FAQs)
1. Can I swap cells between different worksheets in Excel?
Answer: In Excel, you can swap cells between worksheets using the same techniques as before. Make sure both worksheets are open and available, though.
2. Can I swap cells without losing the original data?
Answer: The original data in the destination cell is replaced by the swapped data when you swap cells in Excel. To protect the original data, consider creating a copy of the destination cells first, then performing the swap.
3. How do I swap entire rows or columns in Excel?
Answer: Select the entire row or column you want to move, cut, or copy, then choose the row or column where you want the data to go and paste it. This will swap entire rows or columns. The two rows or columns will be effectively switched this way.
Swap Cells in Excel: Knowledge Hub
Conclusion
Users can effectively manage and change data within a worksheet by using the Excel trick to swap cells in Excel, which is a crucial technique. You may improve data organization, fix errors, and improve the entire data analysis process by following the suggested techniques and best practices. The more you know about this topic, the more productive you’ll be and the easier it will be for you to use Excel. Feel free to ask any queries in the comment section below.
<< Go Back to Excel Cells | Learn Excel

