In this article, we will learn how to move contiguous and non-contiguous rows or columns by using the Excel features and formula.
The ability to move rows in Excel is a valuable skill that can enhance your data organization and analysis.
Efficiently moving rows allows you to reorganize data, sort information based on specific requirements, and transfer rows seamlessly between worksheets or workbooks. This level of control and flexibility enhances the accuracy and efficiency of your data-related tasks, saving you time and effort.
Download Practice Workbook
Download this practice workbook for practice while you are reading this article.
How to Move Rows in Excel
Here we will move rows or columns by using the Excel features and formula.
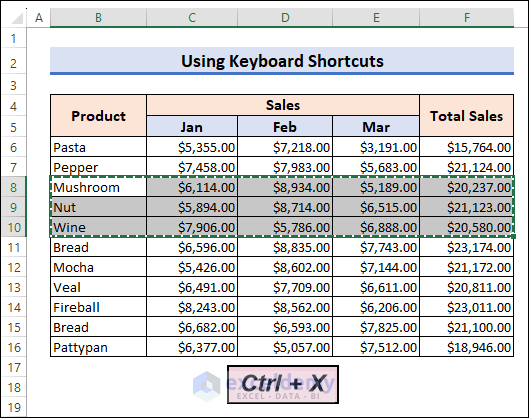
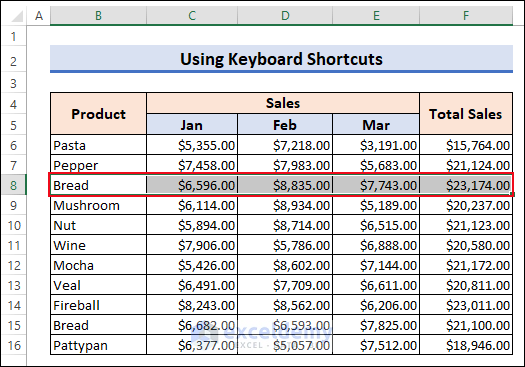
1. Using Keyboard Shortcuts
We’ll easily move rows using the keyboard shortcuts. Let’s follow the instructions below to learn!
Select rows that you want to move. Hence, press Ctrl + X to cut the rows.
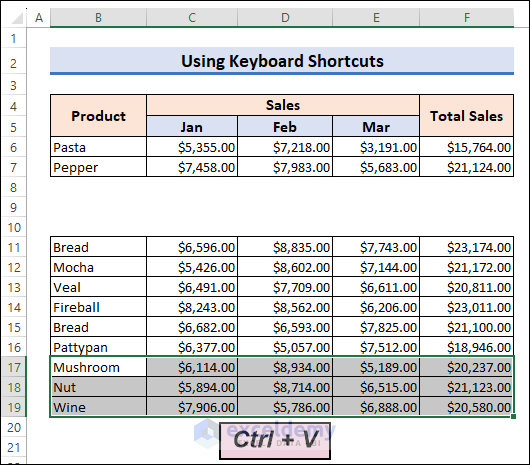
After that, press Ctrl + V to paste the rows to your desired location.
Read More: How to Move Rows Up in Excel
2. Use Shift Key to Move a Row without Replacing
Select rows and place your cursor on the green borderline. As a result, the cursor turns into a four-directional arrow.
Now press and hold the Shift key to move the selected row to your desired location.
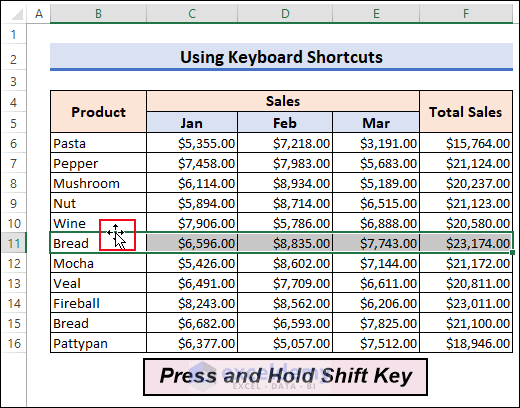
- The moving row is given in the below screenshot.
To understand it, please have a look at the video below.
Read More: How to Move Rows Down in Excel
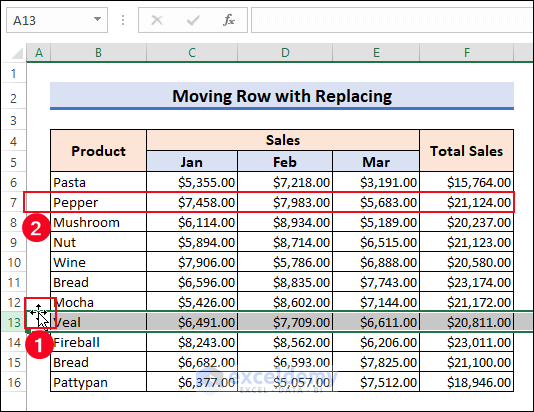
3. Move Row by Replacement
Here, we’ll learn how to move the entire row with replacement.
- Select the entire row 13. Now, place your cursor on the selected row’s borderline.
- As a result, the cursor turns into a four-directional arrow.
- Now press and hold the Left key of the Mouse to move the selected row to your desired location.
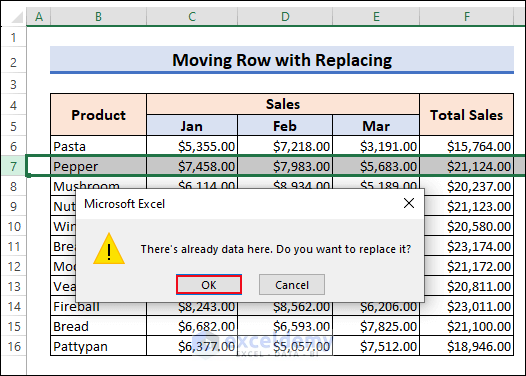
- Hence, a warning message pops >> Hit OK.
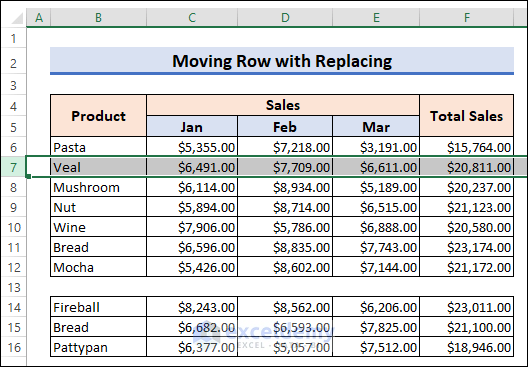
- Finally, you will be able to move the entire row with a replacement of the row.
Read More: How to Rearrange Rows in Excel
4. Applying Paste Options to Move Rows to Columns
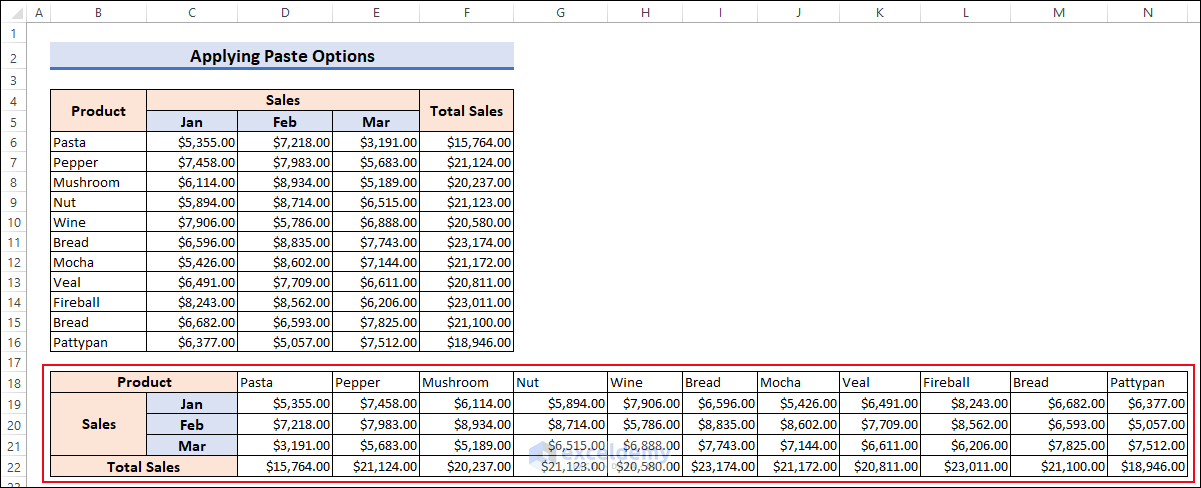
To move rows to columns, select the cells B4:F16 >> Press Ctrl + C >> Select the B18 cell and press your right mouse button >> Choose the Transpose option from the context menu’s Paste Options: button.
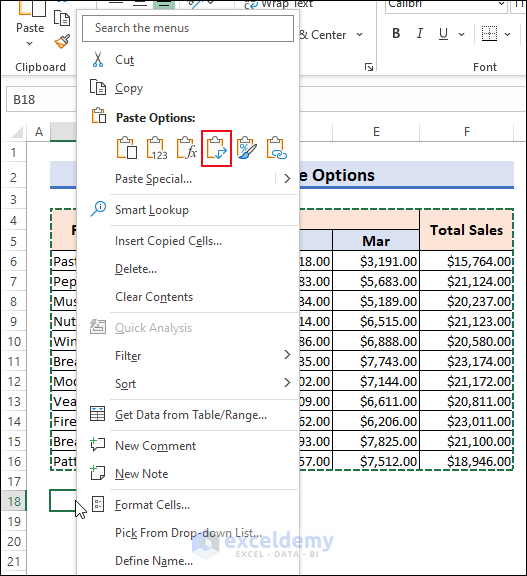
As a result, you will be able to move rows to columns.
5. Using Sort Feature
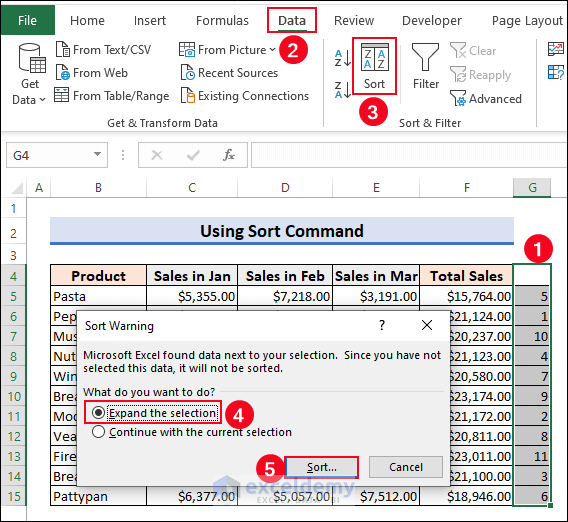
We’ll move rows by using the Sort command. To do that, add a new column by inserting a random number to the right side of the data table.
- Select data range from G4 to G15 >> Go to Data tab >> Choose Sort command from the Sort & Filter group.
- Hence, check the Expand the selection option >> press Sort.
- Now, the Sort dialog box will appear >> Check the My data has headers option >> Select Column G in the Sort by drop-down list.
- Choose the Smallest to Largest option from the Order drop-down list >> press OK.
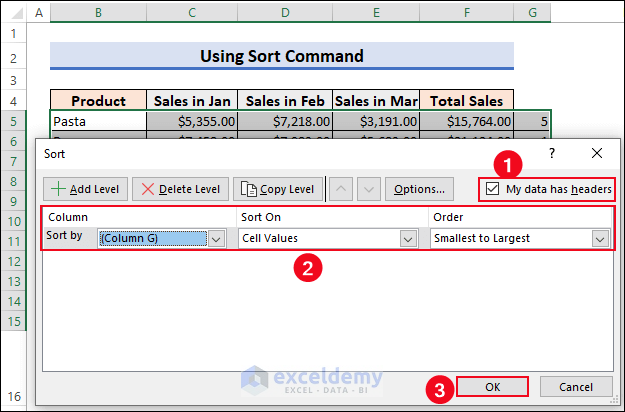
- Here is the final output.

Read More: How to Move Rows in Excel Without Replacing
6. Using Power Query Tool
Another way is to move the rows to columns in Excel by using the Excel Power Query tool.
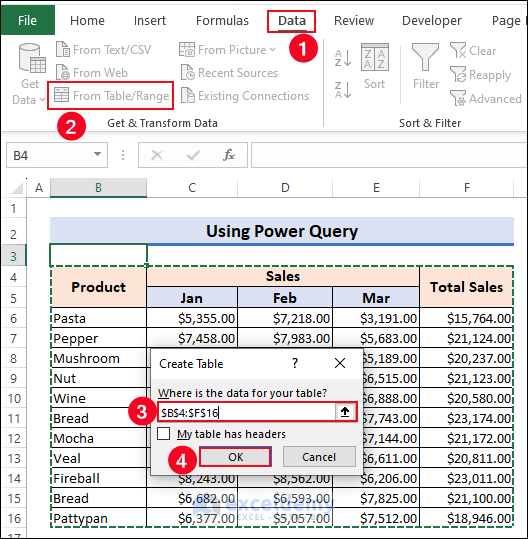
- Go to the Data tab >> Select From Table/Range feature from the Get & Transform Data group.
- Choose the B4:F16 cells for table data from the Create Table window >> Press the OK button.
- As a result, the Power Query Editor window will appear.
- Here, go to the Transform tab >> Use First Row as Headers tool >> Use First Row as Headers option >> Transpose tool.
- After that, choose the Insert option.
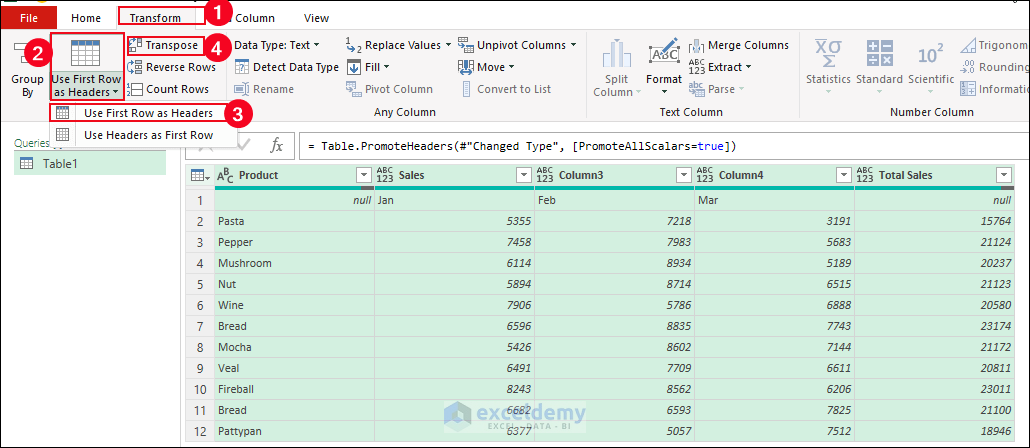
- Further, you will see that the rows are moved into columns in the newly created table.

How to Move Every Other Row to Column in Excel
We will use ISEVEN, ROW, and IF functions to move every other row to another column in Excel.
Type the following formula in cell G6.
=IF(ISEVEN(ROW(F6)),F6,"")And again write down the similar formula in cell H6. Hence, AutoFill both formulas to the rest of the cells.
=IF(ISEVEN(ROW(F6)),"",F6)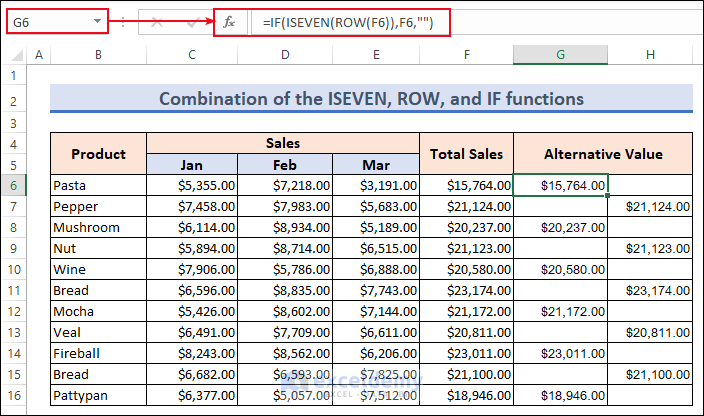
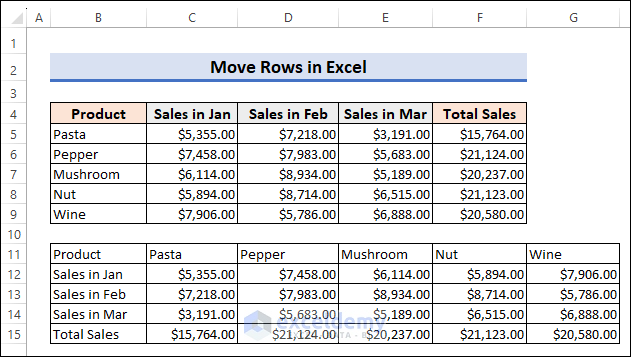
Transpose to Move Rows in Excel
1. Use TRANSPOSE Function
In cell B11, type the following TRANSPOSE function to move rows.
=TRANSPOSE(B4:F9)
2. Run an Excel VBA Code
Press Alt + F11 to pop up the Microsoft Visual Basic Applications window. Hence, select Module from the Insert tab to open a Module for inserting the VBA code.
- Paste the below VBA code in that Module.
Sub Move_Rows_To_Columns()
	Dim MoveFrom As Range
	Dim MoveTo As Range
	Set MoveFrom = Application.InputBox(Prompt:="Select the Rows to Move", _
	Title:="Move Rows in Excel to Columns", Type:=8)
	Set MoveTo = Application.InputBox(Prompt:="Select the cell to insert the Moved Rows", _
	Title:="Move Rows in Excel to Columns", Type:=8)
	MoveFrom.Copy
	MoveTo.Select
	Selection.PasteSpecial Paste:=xlPasteAll, Operation:=xlNone, SkipBlanks:=False, _
	Transpose:=True
	Application.CutCopyMode = False
End Sub
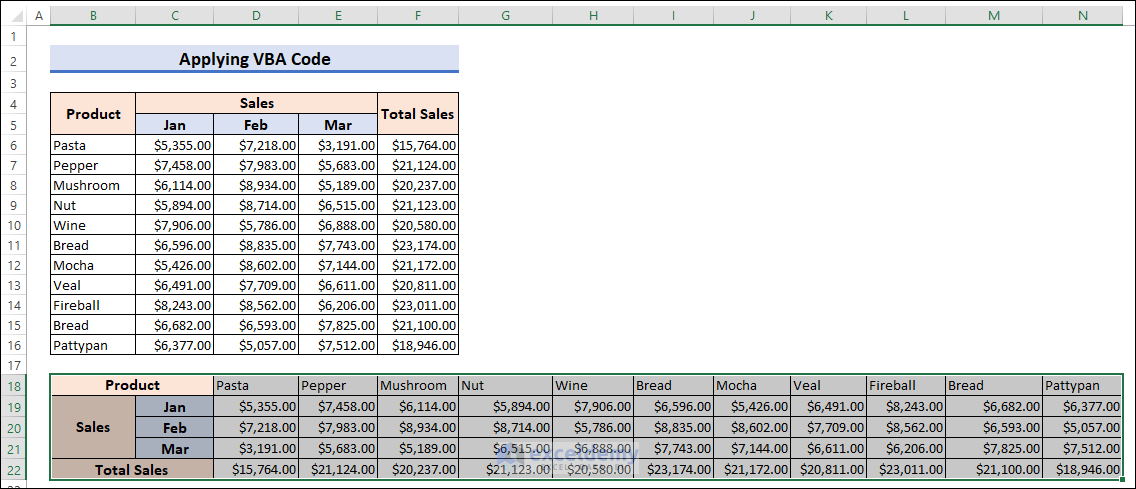
- Insert data range to move rows to columns.
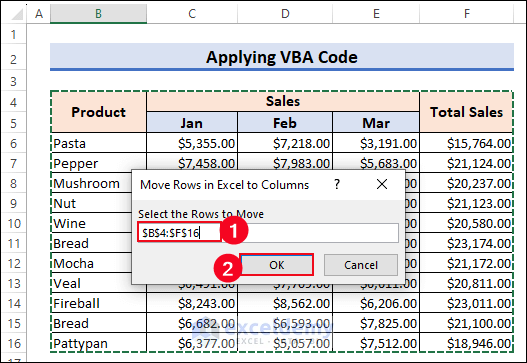
- Select a cell where you want to move the rows.
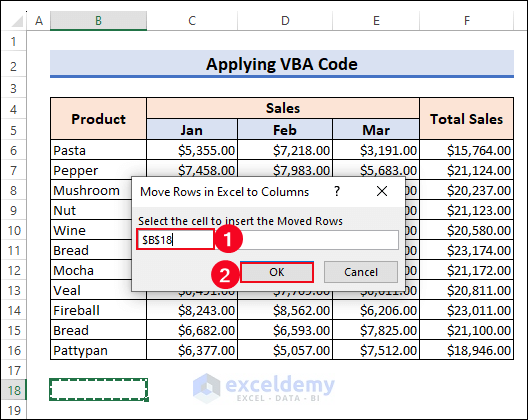
- As a result, your selected rows would be moved in Excel to columns.
Things to Remember
- When working with formulas, you have to be extra careful. Because after moving the rows to columns the formula reference would change too.
- If you work with an Excel table, the transpose feature will not be available. In that case, you have to make the table a range and then move the rows to columns.
- You can move only the non-contiguous rows or columns by applying the Sort feature.
Frequently Asked Questions
1. Can I move multiple rows at once in Excel?
A: Yes, you can move multiple rows at once in Excel. Simply select multiple rows by clicking and dragging the row numbers or by holding the Ctrl key while selecting individual rows. Then follow the same steps mentioned above to move the selected rows to a new location.
2. Can I move rows based on certain criteria in Excel?
A: Yes, you can move rows based on certain criteria in Excel by using sorting or filtering functionality. First, apply a filter to your data. Then, use the sorting feature to arrange the rows based on the desired criteria. After that, you can select and move the filtered rows to a new location.
3. How do I insert a row in Excel and move existing rows down?
A: To insert a row in Excel and move existing rows down, right-click on the row number where you want to insert the new row and select “Insert” from the context menu. Existing rows below the insertion point will automatically shift down.
Move Rows in Excel: Knowledge Hub
- Move Rows in Excel to Columns
- Excel Move Every Other Row to Column
- Excel Move Row to Bottom If Cell Contains
- Excel Move Row to Another Sheet Based On Cell Value
Conclusion
This article discusses the way we can move a row or rows in Excel. Moving rows in Excel is a vital skill that empowers you to streamline data management, analysis, and organization.
Excel provides multiple options, including drag and drop, cut and paste, and Power Query, to meet your preferences. Here, we present how you can move a single row, multiple rows, selected rows, alternate rows, rows based on cell content, based on specific cell content, filtered rows, and rows from the Excel table.
<< Go Back to Rows in Excel | Learn Excel

