In this Excel tutorial, we have discussed
-Several ways of renaming a worksheet.
-How to rename an Excel file.
-How to rename an Excel table.
-Rules to follow while renaming sheets.
We have used Microsoft 365 while preparing this article. But you can apply methods in this article in other versions also.
Renaming means to give a new name according to need. While working in Excel, there may be multiple worksheets or worksheets of similar name. This becomes confusing to select the exact file. That time we need to rename them. To work efficiently, renaming all those workbooks, and worksheets with meaningful and descriptive names is necessary.
Download Practice Workbook
You can download the workbook used to demonstrate methods in this article from here.
How to Rename a Worksheet in Excel
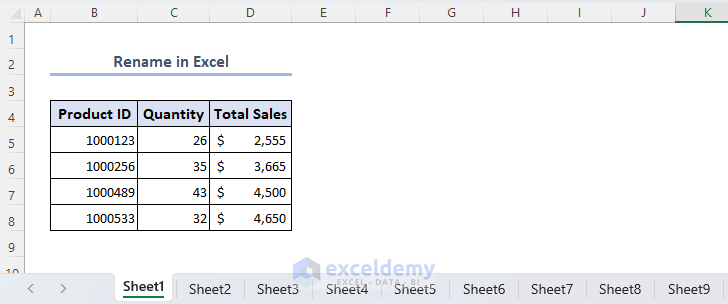
There are several ways of renaming a worksheet in Excel. Here, we have demonstrated some of those. We will be using the following Excel file to elaborate all the methods in this article. There are multiple worksheets to illustrate our methods. The dataset within the Excel file represents some products information of a shop.
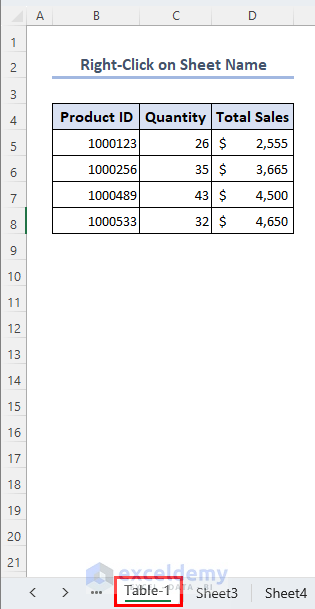
1. Right-Click on Sheet Name
- First, simply right-click on the desired sheet you want to rename from the sheet name section.
- Then, select Rename from Context Menu.

- The worksheet name is now editable.
- Type down your desired worksheet name.

- Here, we have renamed our sheet as Table-1.
- After typing the new sheet name, press Enter.
- And the worksheet name will be changed as follows.
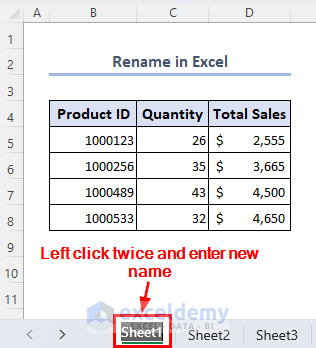
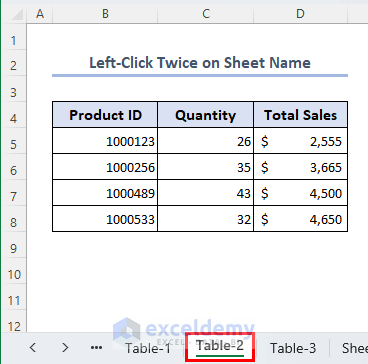
2. Left-Click Twice on Sheet Name
- Click left button of mouse twice on the sheet name.
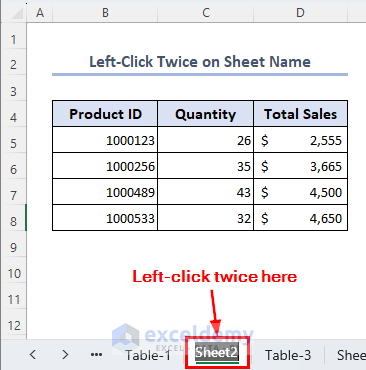
- Enter the new sheet name then hit Enter.
- Here, we have set our worksheet name as Table-2.
3. From the Home Tab
- Go to the Home tab.
- Select the Format drop-down menu.
- Click on Rename Sheet from the drop-down list.
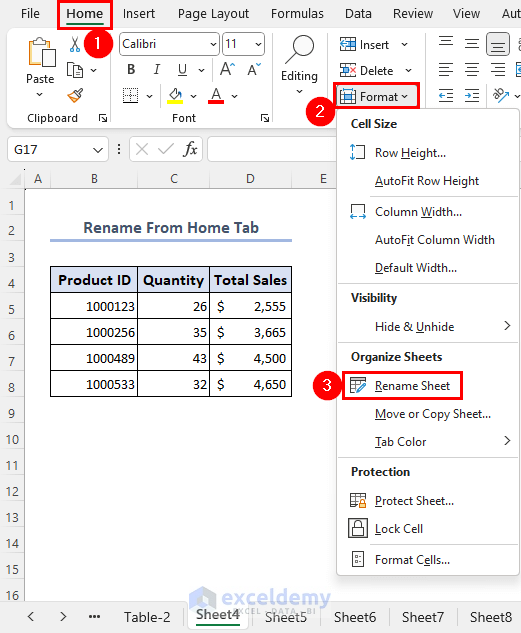
- Rename your sheet.
- After renaming, hit Enter.
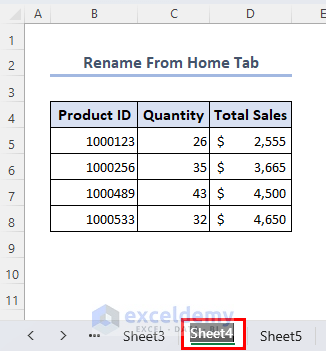
- Here, we have renamed our worksheet to Table-3.

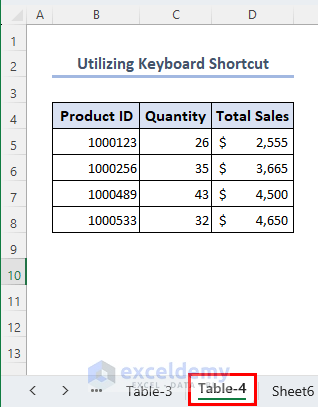
4. Utilizing Keyboard Shortcuts
- Press and hold Alt + H + O + R to rename the current sheet.
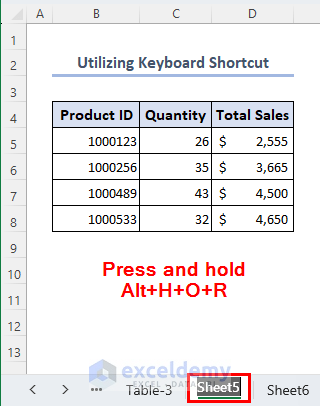
- Type down the new sheet name then press Enter.
- We have set our worksheet name as Table-4 here.
5. Using Excel Accessibility Feature
- Follow these steps: Review >> Check Accessibility drop-down >> Check Accessibility.
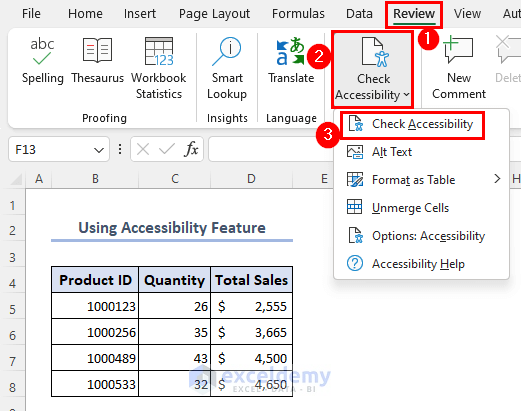
- A new sidebar will appear titled Accessibility.
- Here, you will find only those sheet names whose names aren’t changed. That means you will find only default sheet names here.
- Here, our current sheet is Sheet6.
- Click on Sheet6 from the Accessibility sidebar.
- Select Rename Sheet.

- You can now rename your sheet.
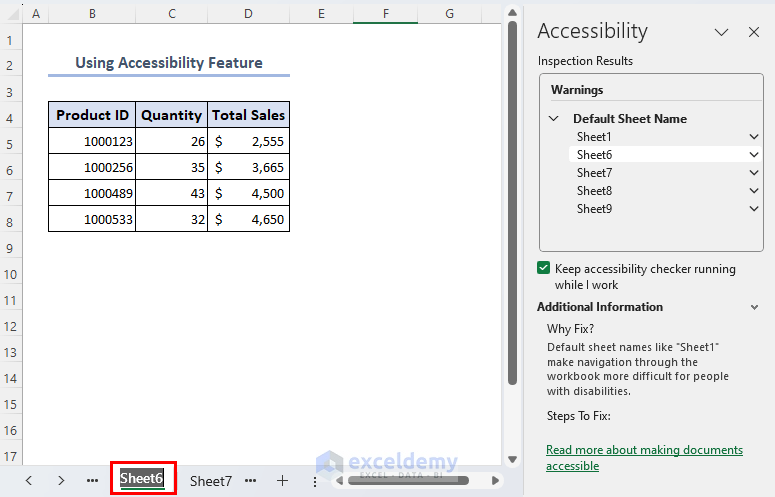
- Type down the new sheet name and hit Enter.
- We have renamed our sheet name Table-5 here.

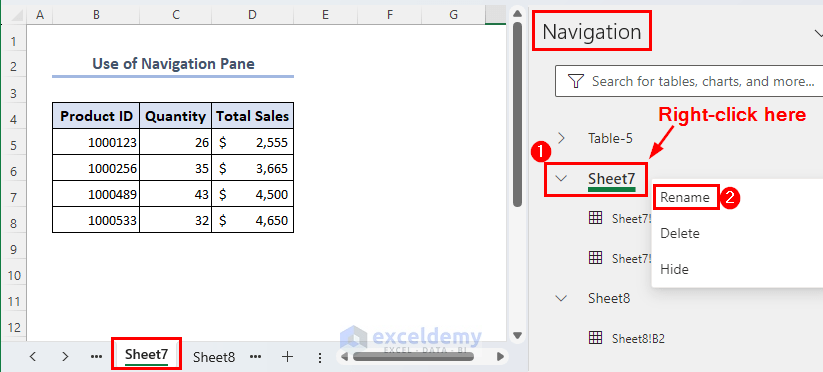
- Go to the View tab.
- Click on Show drop-down menu.
- Select Navigation option.
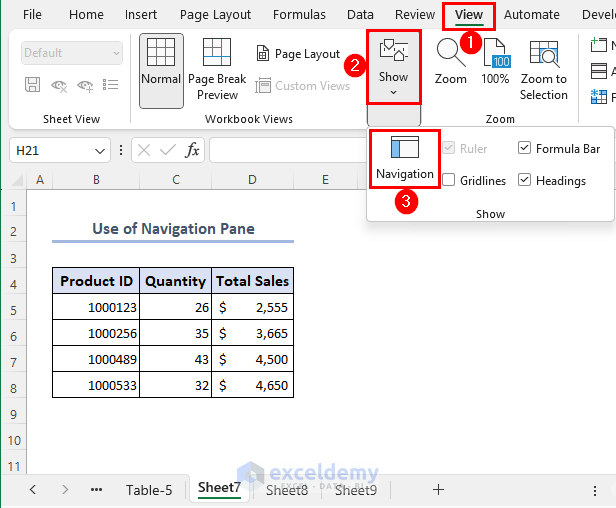
- Navigation sidebar will appear on your worksheet.
- Our current sheet name is Sheet7.
- So, right-click on Sheet7 from the Navigation sidebar.
- Select Rename.
- Type down your desired worksheet name, then click on OK.
- Here, we have typed Table-6 as sheet name.
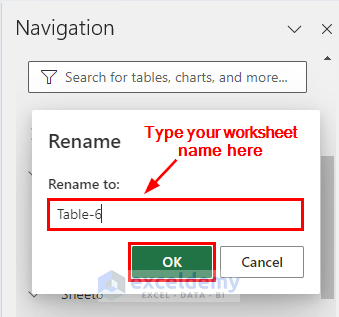
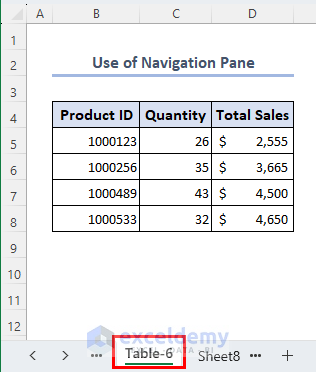
- And our worksheet name is changed as follows.
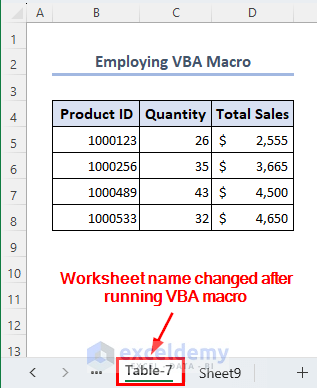
7. Employing VBA Macro
- Right-click on the sheet name then select View Code.
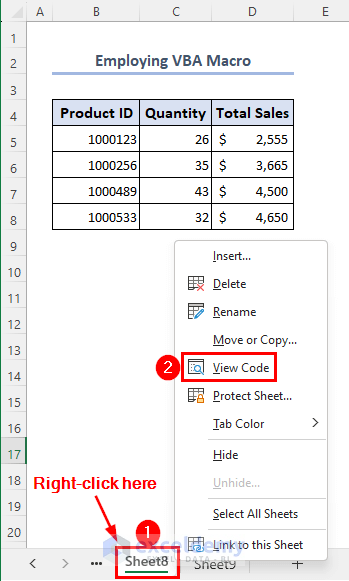
- A new window of Microsoft Visual Basic for Applications will appear.
- From there, go to the Insert tab.
- Select Module.
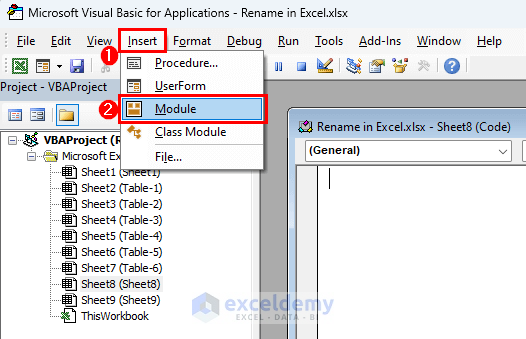
- Copy and paste the following code in the Module1
- Here, we will rename our worksheet from Sheet8 to Table-7.
- Then click on Run.
Sub RenameCurrentSheet()

    Dim sheet As worksheet
    Set sheet = ThisWorkbook.Sheets("Sheet8")

    sheet.Name = "Table-7"
End Sub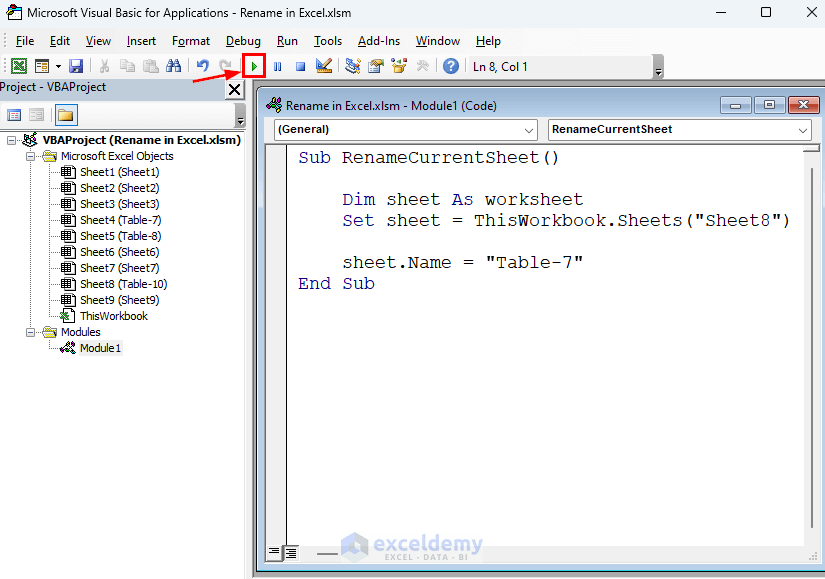
VBA Breakdown
- Sub RenameCurrentSheet()
Indicates the start of a subroutine named RenameCurrentSheet.
- Dim sheet As worksheet
The variable sheet of type worksheet is declared in this line.
- Set sheet = ThisWorkbook.Sheets(“Sheet8”)
Assigns the “Sheet8” worksheet object to the sheet variable. ThisWorkbook is the workbook that contains the VBA code, and .Sheets(“Sheet8”) opens the worksheet with the same name in that workbook.
- Name = “Table-7”
This command renames the worksheet named Sheet8 to Table-7.
- End Sub
Ends the subroutine.
- And our worksheet is renamed as follows.
How to Rename an Excel File
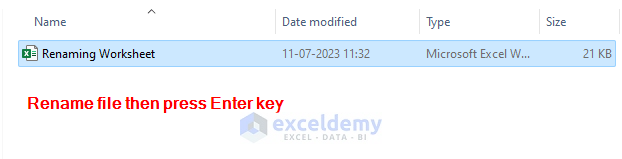
- To rename an Excel file name in windows 11, first, right-click on the file.
- Click on Rename.

- You can now rename the Excel file by typing down as you want.

- Here we have set our file name as Renaming Worksheet.
How to Rename a Table in Excel
After creating a table from your dataset, a new tab named Table Design will appear in the toolbar.
- First, select any cell of your table.
- Go to the Table Design tab.
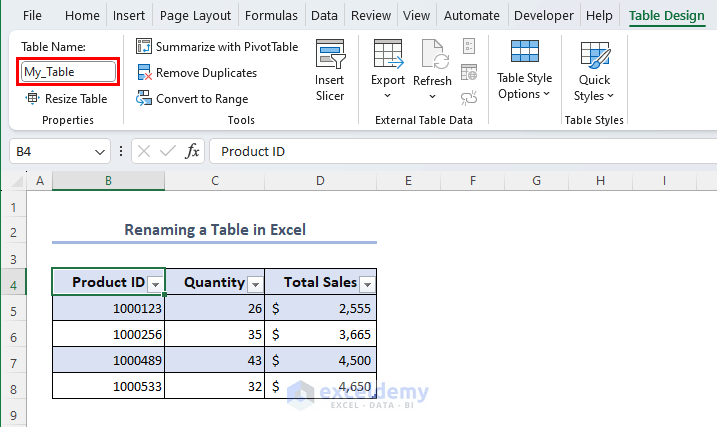
- In the Properties section, you will find a Table Name box to rename your table.
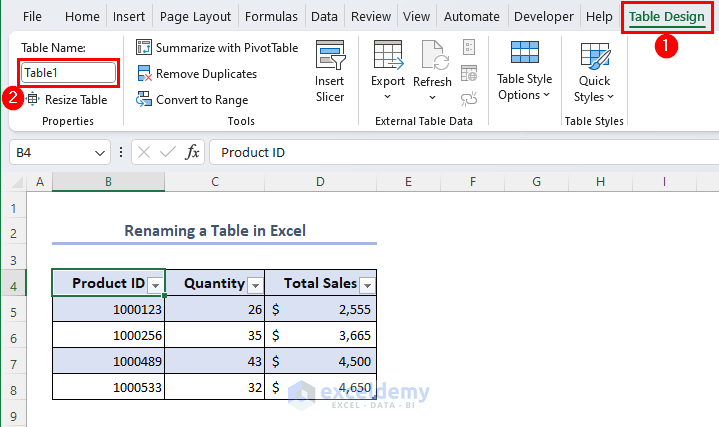
- Type your desired table name there.
- Here, we have set our table name as My_Table.
- Table name must not carry any space.
- Must start table name using any alphabetical letter or underscore.
- Some specific characters you can’t use for the table name.
Rules to Follow While Renaming Sheets in Excel
- Try to keep the name of your sheet within 31 characters as it’s the maximum limit.
- You must give your sheet a name otherwise you can’t leave the sheet name blank.
- You can use the ditto symbol (
") at the beginning and end of your worksheet name but you can’t use the apostrophe symbol ('). However, you can use the apostrophe symbol in the middle of your worksheet name. - In a workbook, you can’t set two worksheets with the same name.
- Some specific characters such as – [ ] \ / ? : * can’t be used while renaming a worksheet.
Frequently Asked Questions
1. Is it possible to rename multiple worksheets at once in Excel?
Yes, you can use a simple VBA macro to rename multiple worksheets at once in Excel. Let’s assume, you have a workbook where there are 3 worksheets named Sheet1, Sheet2, and Sheet3. You want to rename them as Table-1, Table-2, and Table-3 respectively at once.
- Open Visual Basic.
- Insert a new module from the Insert tab.
- Copy and paste the following code into the module window.
- Click on Run.
Sub RenameCurrentSheet()

    Dim Worksheet1 As Worksheet
    Dim Worksheet2 As Worksheet
    Dim Worksheet3 As Worksheet

    Set Worksheet1 = ThisWorkbook.Sheets("Sheet1")
    Set Worksheet2 = ThisWorkbook.Sheets("Sheet2")
    Set Worksheet3 = ThisWorkbook.Sheets("Sheet3")

    Worksheet1.Name = "Table-1"
    Worksheet2.Name = "Table-2"
    Worksheet3.Name = "Table-3"

End Sub
2. Is it possible to undo a worksheet rename in Excel?
No, you can’t undo a worksheet rename in Excel.
3. How to use a worksheet name in Excel formula?
You can use sheet name with exclamation ( ! ) mark within an Excel formula.
Let’s say, you have some numeric values in Sheet1 within range A1:A5. And some other numeric values in Sheet2 within range B1:B5. Now, you want to add those ranges in Sheet1 within range C1:C5.
- Select cell C1 in Sheet1.
- Enter this formula: =A1+Sheet2!B1 then press Enter. Here, in cell C1, the value of cell A1 from Sheet1 will be added with the value of cell B1 from Sheet2.
- Use the Fill handle icon to drag-down and get the summation of other values.
Conclusion
To work quickly and effectively in Excel, one should know how to rename in Excel. In this article, we have learned how to rename worksheets in Excel along with how to rename an Excel table and an Excel file.
Hope, you have found whatever you were looking for. Visit our site ExcelDemy to explore more relevant articles.
Rename in Excel: Knowledge Hub
<< Go Back to Worksheets | Learn Excel

